To connect your ChromeBook to the eduroam network, you need to perform an onboarding of your ChromeBook. To complete the onboarding, you must be connected to a network of internet access.
Step 1: Connect to our onboard network
If you are at Dalarna University Campus and are not connected to a network with Internet access, you can use our onboard network. If you already have internet access over another network, you can continue to use it and continue with step 2.
-
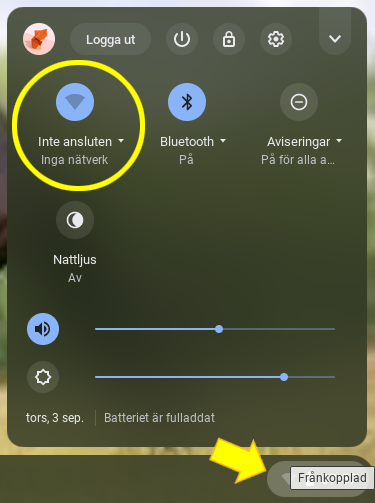
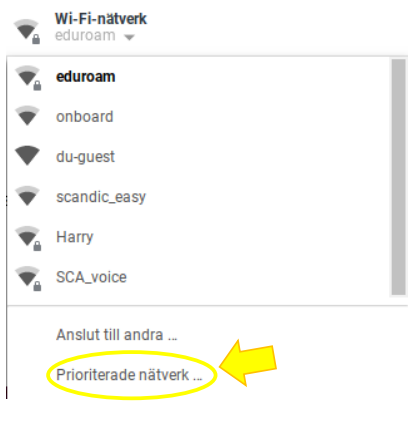
First, click the wireless network icon in the toolbar in the bottom right
-
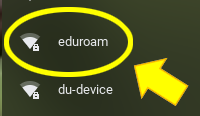
Then click the network symptom, circled in the image below.
-
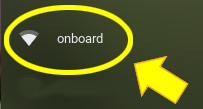
Select onboard from the list of available networks to connect to it.
Step 2: Complete the onboarding process
-
Open your browser (Chrome) and browse to the http://onboard.du.se
You may see a message that your device is not supported, but you can resolve this by selecting Other in the drop-down list.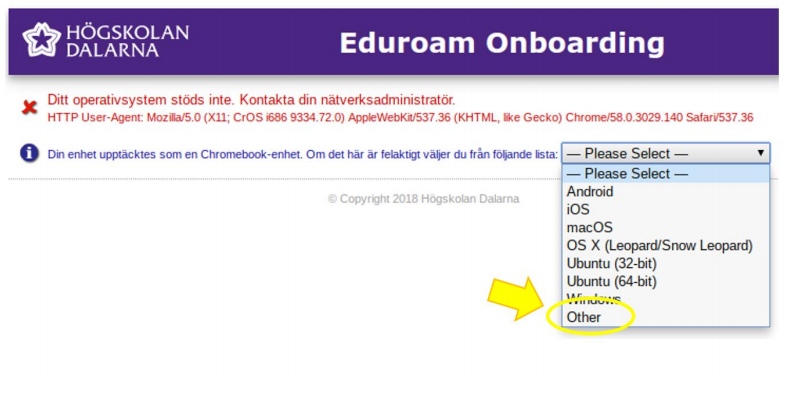
-
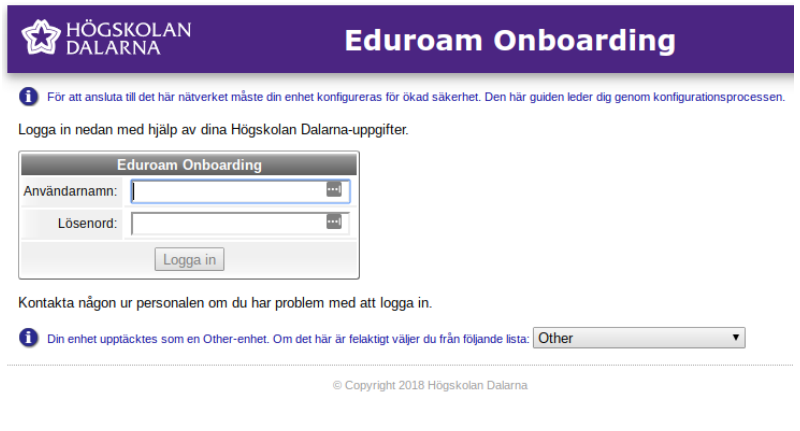
Once you have done so, you should log in with your user information from Dalarna University.
-
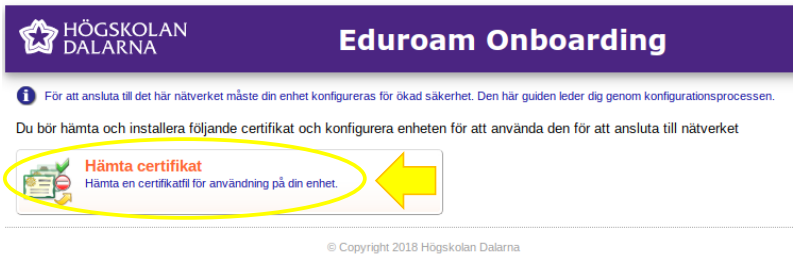
After you sign in, the following page appears. Click Download Certificate to download your eduroam certificate.
-
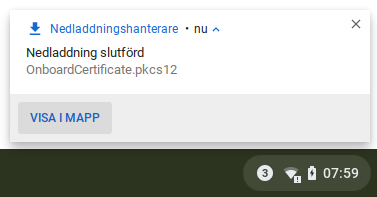
The certificate is saved in the download folder on your Chromebook.
-
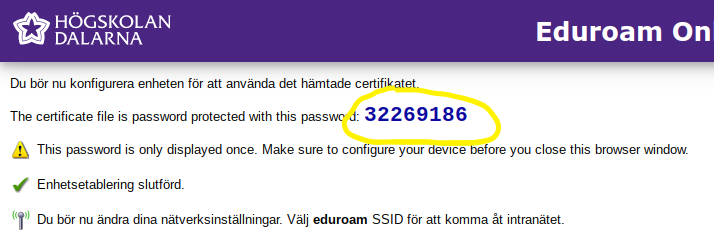
Once the certificate is saved, you will see a number code on the screen, it will be required to be entered later in the process
-
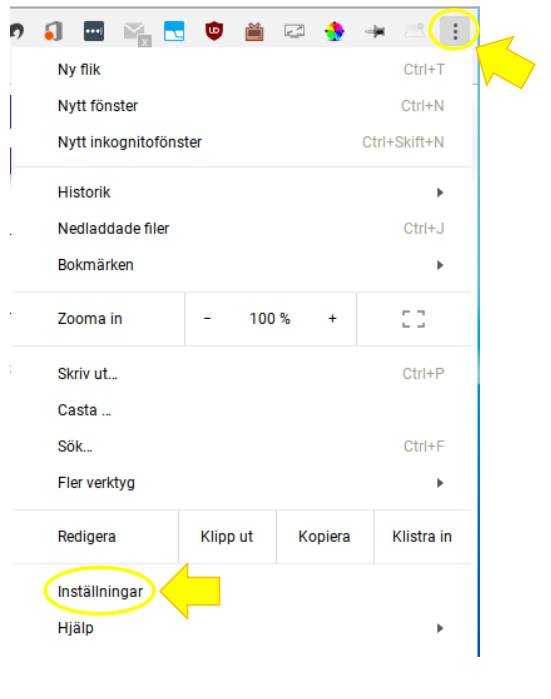
Go to Settings in the Chrome browser.
-
Click the three dots in the upper right and select Settings/cogwheel.
-
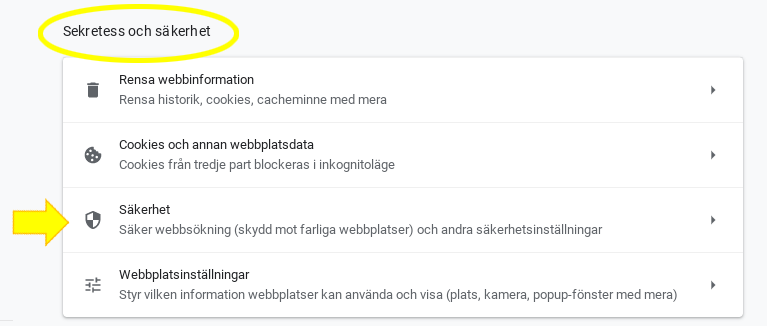
Then select Privacy and security
-
Then search for the settings to manage certificates.

-
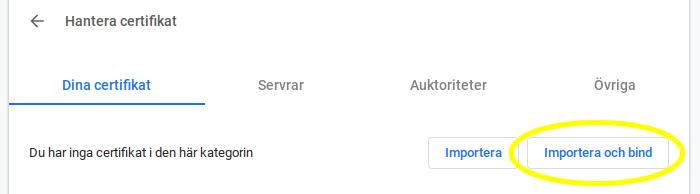
If you already have an eduroam certificate in the list of Your Certificates, select it and click the Delete button... Repeat until you no longer have any eduroam certificates in the list.
-
Then click Import and bind
-
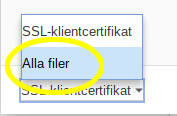
When the open files window appears, select All Files from the drop-down list at the bottom of the window.
-
Then select the file with your certificate that you saved earlier. The file name is OnboardCertificate.pkcs12 or similar. Make sure you select the file that was created today (the newest).

-
Click Open to open the certificate.
-
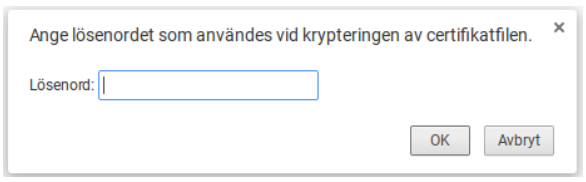
You will then receive a password question. The password you should enter is the number code you obtained on the screen earlier in the process. Type the number code and click OK.
Step 3: Connect to the eduroam network
When the certificate installation is complete, you need to connect to the eduroam network to configure the use of the certificate.
-
Click the wireless network icon in the toolbar in the lower right
-
Then click the network symptom, circled in the image below.
-
Choose eduroam.
-
The following dialog box with configuration tasks is now displayed. Change settings as below.
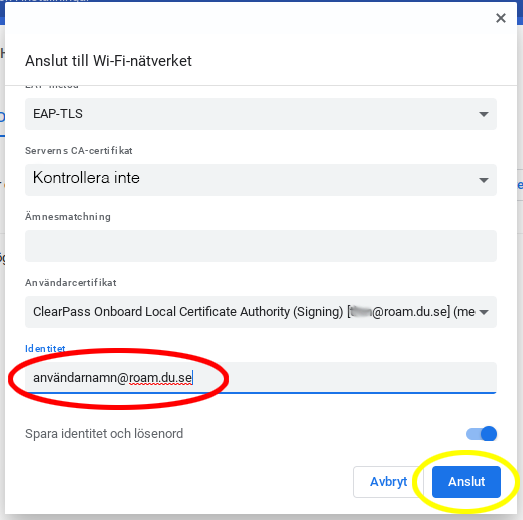
- 1. EAP method: EAP-TLS
- 2. Server CA Certificate: Don't validate
- 3. User certificate: Select what you just registered
- 4. Identity: Should be your username ended with @roam.du.se (NOTE: it should be @roam.du.se and not @eduroam.du.se that may be prefilled if you have previously used eduroam on this device.)
- 5. Click save identity and password
- Click Connect
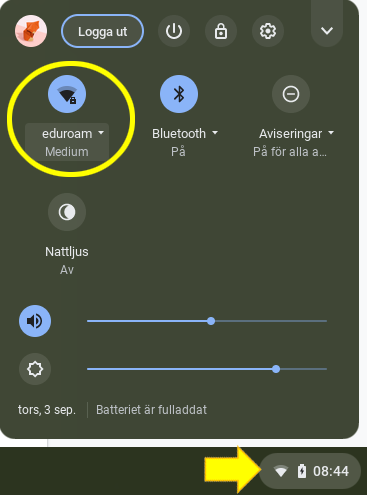
- Once you have done so, you should be connected to eduroam. You can check this by clicking on the network symbol at the clock and making sure that it says eduroam on the network, see circled in the picture below.
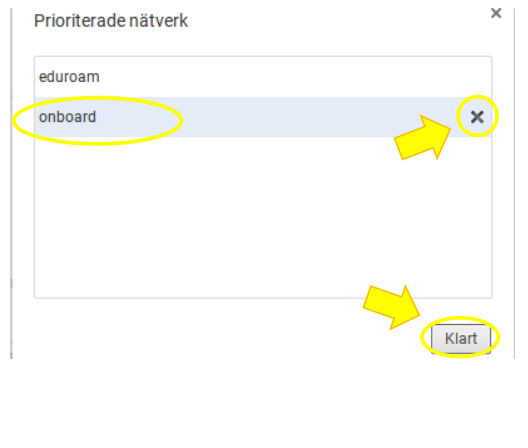
Step 4: Forget the onboard network
If you have used the onboarding network in step 1, it is good to "forget" it when the onboarding process is complete.
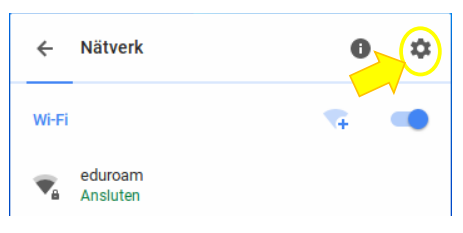
- Under network connections, click the gear.
- Click Priority Networks...
- In the list of priority networks, remove onboard, and click Done.
Need help with onboarding?
If you need help, you can send an email to support@du.se, call 023-778000 or visit Servicecenter (reception).